编辑 SSHD 配置
vim /etc/ssh/sshd_config将 GSSAPIAuthentication 的设置由 yes 改为 no
将 UseDNS 设置修改为 no
重启服务:service sshd restart
核实目录下 /var/log/btmp 文件是否过大

删除它
rm -rf /var/log/btmp
# 或者
touch /var/log/btmp学习日志 LIUGUOFENG
vim /etc/ssh/sshd_config将 GSSAPIAuthentication 的设置由 yes 改为 no
将 UseDNS 设置修改为 no
重启服务:service sshd restart
删除它
rm -rf /var/log/btmp
# 或者
touch /var/log/btmpcd /etc/sysconfig/network-scripts/找到网卡 例如 ifcfg-eno33
vi ifcfg-eno33将最后一行的 ONBOOT=no 改为 ONBOOT=yes 然后退出 vi
退出重启 network
service network restart最近 MySQL 服务总是挂掉


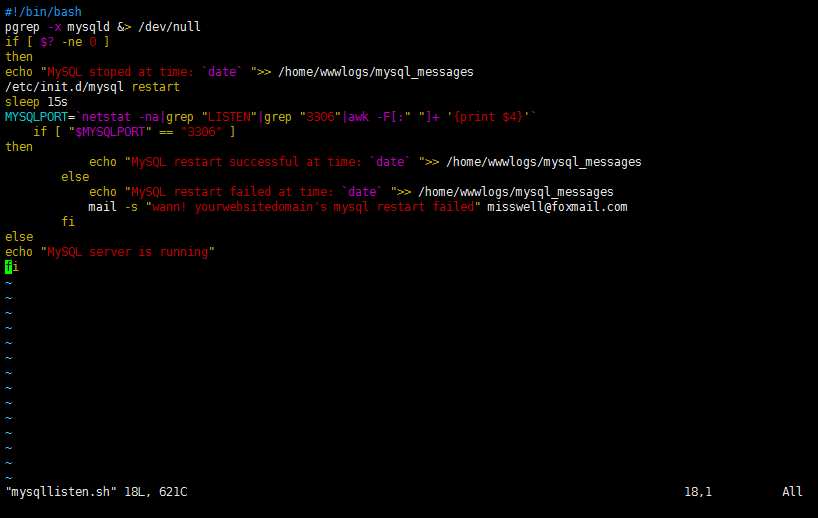
cd ~
vim /mysqllisten.sh
#!/bin/bash
pgrep -x mysqld &> /dev/null
if [ $? -ne 0 ]
then
echo "MySQL stoped at time: `date` ">> /home/wwwlogs/mysql_messages
/etc/init.d/mysql restart
sleep 15s
MYSQLPORT=`netstat -na|grep "LISTEN"|grep "3306"|awk -F[:" "]+ '{print $4}'`
if [ "$MYSQLPORT" == "3306" ]
then
echo "MySQL restart successful at time: `date` ">> /home/wwwlogs/mysql_messages
else
echo "MySQL restart failed at time: `date` ">> /home/wwwlogs/mysql_messages
mail -s "wann! yourwebsitedomain's mysql restart failed" 这里写你的邮箱地址
fi
else
echo "MySQL server is running"
fichmod +x ./mysqllisten.sh添加定时任务
crontab -e

*/10 * * * * /bin/bash /root/mysqllisten.sh

service crond restart
LNMP使用中mysql宕机挂掉后自动重启脚本
http://xiaohost.com/1580.html
官网地址 https://nodejs.org/en/download/
源码编译
cd ~
wget https://nodejs.org/dist/v10.13.0/node-v10.13.0.tar.gz
tar zxvf node-v10.13.0.tar.gz
cd node-v10.13.0
./configure
make
make install

CentOS 6、7,先执行:
yum install epel-releasecd /root/
wget https://dl.eff.org/certbot-auto --no-check-certificate
chmod +x ./certbot-auto
./certbot-auto -n单域名生成证书:
./certbot-auto certonly --email jollyfon@gmail.com --agree-tos --no-eff-email --webroot -w /home/wwwroot/wanai.unetu.net -d wanai.unetu.net安装成功返回
IMPORTANT NOTES:
 - Congratulations! Your certificate and chain have been saved at:
   /etc/letsencrypt/live/wanai.unetu.net/fullchain.pem
   Your key file has been saved at:
   /etc/letsencrypt/live/wanai.unetu.net/privkey.pem
   Your cert will expire on 2019-01-30. To obtain a new or tweaked
   version of this certificate in the future, simply run certbot-auto
   again. To non-interactively renew *all* of your certificates, run
   "certbot-auto renew"
 - Your account credentials have been saved in your Certbot
   configuration directory at /etc/letsencrypt. You should make a
   secure backup of this folder now. This configuration directory will
   also contain certificates and private keys obtained by Certbot so
   making regular backups of this folder is ideal.
 - If you like Certbot, please consider supporting our work by:

   Donating to ISRG / Let's Encrypt:   https://letsencrypt.org/donate
   Donating to EFF:                    https://eff.org/donate-le
多域名单目录生成单证书:(即一个网站多个域名使用同一个证书)
./certbot-auto certonly --email jollyfon@gmail.com --agree-tos --no-eff-email --webroot -w /home/wwwroot/wanai.unetu.net -d wanai.unetu.net www.unetu.net多域名多目录生成一个证书:(即一次生成多个域名的一个证书)
./certbot-auto certonly --email jollyfon@gmail.com --agree-tos --no-eff-email --webroot -w /home/wwwroot/wanai.unetu.net -d wanai.unetu.net www.unetu.net -w /home/wwwroot/wanaioa.unetu.net -d wanaioa.unetu.net -d unetu.net安装完成后证书文件位置
/etc/letsencrypt/live
有四个文件
/etc/letsencrypt/live/wanai.unetu.net/cert.pem
/etc/letsencrypt/live/wanai.unetu.net/chain.pem
/etc/letsencrypt/live/wanai.unetu.net/fullchain.pem
/etc/letsencrypt/live/wanai.unetu.net/privkey.pem
Nginx 配置
listen 443 ssl;
server_name wanai.unetu.net;
index index.html index.htm index.php default.html default.htm default.php;
root /home/wwwroot/wanai.unetu.net;
ssl_certificate /etc/letsencrypt/live/wanai.unetu.net/fullchain.pem;    #前面生成的证书,改一下里面的域名就行
ssl_certificate_key /etc/letsencrypt/live/wanai.unetu.net/privkey.pem;   #前面生成的密钥,改一下里面的域名就行
SSLCertificateChainFile /etc/letsencrypt/live/wanai.unetu.net/chain.pem; #Apache 2.2版本需要加入该中间证书,否则浏览器可能不信任
ssl_ciphers "EECDH+CHACHA20:EECDH+CHACHA20-draft:EECDH+AES128:RSA+AES128:EECDH+AES256:RSA+AES256:EECDH+3DES:RSA+3DES:!MD5";
ssl_protocols TLSv1 TLSv1.1 TLSv1.2;
ssl_prefer_server_ciphers on;
ssl_session_cache shared:SSL:10m;
Let's Encrypt 证书的有效期为 90 天,可自动续期
打开 crontab
crontab -e添加规则
0 3 */5 * * /root/certbot-auto renew --disable-hook-validation --renew-hook "/etc/init.d/nginx reload"我的示例
server
    {
        listen 443 ssl http2;
        #listen [::]:443 ssl http2;
        server_name wanai.unetu.net ;
        index index.html index.htm index.php default.html default.htm default.php;
        root  /home/wwwroot/wanai.unetu.net;
        ssl on;
        ssl_certificate /etc/letsencrypt/live/wanai.unetu.net/fullchain.pem;
        ssl_certificate_key /etc/letsencrypt/live/wanai.unetu.net/privkey.pem;
        ssl_protocols TLSv1 TLSv1.1 TLSv1.2;
        ssl_prefer_server_ciphers on;
        ssl_session_cache shared:SSL:10m;

        include rewrite/codeigniter.conf;

        location  ~ [^/]\.php(/|$)
        {
            fastcgi_pass  127.0.0.1:9001; #注意此端口
            fastcgi_index index.php;
            fastcgi_param  SCRIPT_FILENAME  $document_root$fastcgi_script_name;
            include        fastcgi_params;

        }

        location ~ .*\.(gif|jpg|jpeg|png|bmp|swf)$
        {
            expires      30d;
        }

        location ~ .*\.(js|css)?$
        {
            expires      12h;
        }

        location ~ /.well-known {
            allow all;
        }

        location ~ /\.
        {
            deny all;
        }

        access_log  /home/wwwlogs/wanai.unetu.net.log;
    }
参考文献:
使用 pscp.exe
该程序集成在 PuTTY,安装 PuTTY

安装完成后即可在命令行里使用 pscp 命令
程序会自动添加环境变量,若找不到命令可手动添加环境变量

然后 使用命令(以下示例)
pscp root@198.13.50.216:/root/lnmp-install.log /down/
备份本地 yum 源
mv /etc/yum.repos.d/CentOS-Base.repo /etc/yum.repos.d/CentOS-Base.repo_bak获取阿里 yum 源配置文件
wget -O /etc/yum.repos.d/CentOS-Base.repo http://mirrors.aliyun.com/repo/Centos-7.repo 清理一下旧包
yum clean all更新 cache 生成缓存
yum makecache更新(如果需要)
yum -y update 检查系统中是否已安装 vsftpd
rpm -qa | grep vsftpd若未安装则使用安装命令
yum -y install vsftpd安装完之后创建 ftp 用户和适用目录
useradd -s /sbin/nologin -d /home/ftproot ftproot注:目录不要手动创建,该命令会自动创建
更令 ftp 用户密码
passwd ftproot然后输入两次密码
打开 vsftpd 的配置文件
vim /etc/vsftpd/vsftpd.conf找到 anonymous_enable 配置项,默认是YES,修改成NO,表示不允许匿名用户登录
:wq 保存文件,执行启动命令

CentOS 6 下启动
service vsftpd start查看运行状态
service vsftpd statusCentOS 7 下启动
systemctl start vsftpd.service查看运行状态
systemctl status vsftpd.service完毕

安装 PHP7.2.4 curl 扩展:

学习慕课网-Swoole入门到实战打造高性能赛事直播平台-7.9 章节时报错 undefined curl_init(),导致无法发送阿里大鱼短信,以下是报错信息
PHP Fatal error: Uncaught Error: Call to undefined function Aliyun\Core\Http\curl_init() in /home/misswell/Code/thinkphp_5.1.0_rc/extend/ali/lib/Core/Http/HttpHelper.php:13
原因是缺少 curl 扩展
我的安装代码:
misswell@ubuntu:~/Downloads$ wget http://curl.haxx.se/download/curl-7.32.0.tar.gz
misswell@ubuntu:~/Downloads$ tar zxvf curl-7.32.0.tar.gz
misswell@ubuntu:~/Downloads$ cd curl-7.32.0
misswell@ubuntu:~/Downloads/curl-7.32.0$ ./configure --prefix=/usr/local/curl
misswell@ubuntu:~/Downloads/curl-7.32.0$ cd  ../php-7.2.4/ext/curl/
misswell@ubuntu:~/Downloads/php-7.2.4/ext/curl$ /home/misswell/soft/php/bin/phpize
misswell@ubuntu:~/Downloads/php-7.2.4/ext/curl$ ./configure --with-php-config=/home/misswell/soft/php/bin/php-config  --with-curl=/home/misswell/Downloads/curl-7.32.0
misswell@ubuntu:~/Downloads/php-7.2.4/ext/curl$ make && make install
...
Installing shared extensions:     /home/misswell/soft/php/lib/php/extensions/no-debug-non-zts-20170718/
解释:
php源码目录:/home/misswell/Downloads/php-7.2.4/
php编译目录:/home/misswell/soft/php/
curl源码目录:/home/misswell/Downloads/curl-7.32.0/
1.curl,主要用于发送http请求,是php的一个扩展包。
2.安装过程:
(1)curl下载:http://curl.haxx.se/download.html
(2)具体安装过程:
wget http://curl.haxx.se/download/curl-7.32.0.tar.gz

tar zxvf curl-7.32.0.tar.gz

cd curl-7.32.0

./configure --prefix=/usr/local/curl

cd /(php源码目录)/ext/curl

运行phpize: /(php编译目录)/bin/phpize

./configure --with-php-config=/(php编译目录)/bin/php-config --with-curl=/(curl源码目录)

make && make install

修改php.ini,增加:extension=curl.so(如果没有安装过其他php扩展,则需要同时配置extension_dir="/(php编译后目录)/lib/php/extensions/no-debug-non-zts-20121212/",上一个步骤生成.so文件的时候,会输出extension_dir目录)
(3)检验是否安装成功:
/(php编译后目录)/bin/php -m | grep curl ——正常打印curl,则表示安装成功(php -m会打印出已安装的扩展模块)

环境变量配置的两个方法:
1)修改 /etc/profile 文件 推荐使用这种方法,因为所有用户的 shell 都有权使用这些环境变量,缺点是可能会给系统带来安全性问题。 这里是针对所有的用户的,所有的 shell;
[root@test ~]# vim /etc/profile
....
export PATH=$PATH:/usr/local/mysql/bin

#使用source命令使修改立刻生效:
[root@test ~]# source  /etc/profile
2)修改 .bashrc 文件,这种方法更为安全,它可以把使用这些环境变量的权限控制到用户级别,这里是针对某一个特定的用户,如果需要给某个用户权限
使用这些环境变量,只需要修改其个人用户主目录下的 .bashrc 文件就可以了。
[root@test ~]# vim /root/.bashrc
export PATH=$PATH:/usr/local/mysql/bin

[root@test ~]# source  /root/.bashrc
[app@test ~]$ vim ~/.bashrc
......
KETTLE_HOME=/data/nstc/kettle3.2
export KETTLE_HOME

#注意:配置好环境变量后,要记得export输出这个变量,否则如下source后无效!
[app@test ~]$ source .bashrc //使之生效
[app@test ~]$ echo $KETTLE_HOME
/data/nstc/kettle3.2
[app@test ~]$ env
.........
KETTLE_HOME=/data/nstc/kettle3.2
.bash_profile 和 .bashrc 的区别:
/etc/profile: 此文件为系统的每个用户设置环境信息,当用户第一次登录时,该文件被执行.并从/etc/profile.d目录的配置文件中搜集shell的设置.
/etc/bashrc: 为每一个运行bash shell的用户执行此文件.当bash shell被打开时,该文件被读取.
~/.bash_profile: 每个用户都可使用该文件输入专用于自己使用的shell信息,当用户登录时,该文件仅仅执行一次!默认情况下,他设置一些环境变量,执行用户的.bashrc文件.
~/.bashrc: 该文件包含专用于你的bash shell的bash信息,当登录时以及每次打开新的shell时,该该文件被读取.
~/.bash_logout: 当每次退出系统(退出bash shell)时,执行该文件.
另外,/etc/profile中设定的变量(全局)的可以作用于任何用户,而~/.bashrc等中设定的变量(局部)只能继承/etc/profile中的变量,他们是"父子"关系.